Tuesday, September 10, 2013

Tartiflette au fromage Kenogami ( Dauphinoise, scalloped potatoes )

What is Tartiflette you ask? Tartiflette is a French dish from the Savoie region. It is made with potatoes, reblochon cheese ( soft brie like cheese), cream, and lardons ( fatback, salted pork etc), and it is divine ;) For most Americans this is called scalloped potatoes, it is also similar to potatoes a la  Dauphinoise.

This dish is very simple, as most classic French dishes are and goes well with side salads and freshly sliced garden tomatoes, cucumbers and even avocados.  

Note: The cheese I used in this recipe is Kenogami cheese, a soft cheese made with unpasturized milk from the northern region of Quebec where I live, however a traditional Tartiflette is made with Reblochon cheese ( pictured below), that can easily be substituted for Brie Camembert, or other soft cheeses.
Also the lardons mentioned in the recipe can be fatback ( thick fleshy bacon ), pancetta, salted pork or regular bacon.

This recipe is written in stone, feel free to improvise with smoked salmon, blue cheese, etc...make it your own! Bon apétit!


First time I have put instructions directly on my step by step pictures...I spent a couple of hours editing them, I hope they come across clearly!! Feedback is appreciated!

Before we start, here is the example of Reblochon or soft cheese ;)


Saturday, July 6, 2013

French Crêpes

French Crêpes are thin and delicate, delectable and oh so versatile. Perfect for breakfast, lunch or dinner and can be sweet or savory. This morning I made them for the kids and we ate them quite simply, with maple syrup and powdered sugar ( the kids like it with powdered sugar lol). I personally prefer to eat them with a wonderful caramel sauce I learned to make in a restaurant I once worked at years ago. I'll try to get that recipe up here soon. In addition to eating them with the caramel sauce I like to also eat them with Camembert brie neatly tucked into the folds of a crêpe ( or two, lol), and then completed with a drizzling of caramel sauce...it is so decadent and satisfactory...I guarantee you will make it more than once. 
As for the savory aspects of crêpes, you can add herbs and spices into the batter to compliment any fillings or garnishments. Ham and cheese filled crêpes with a classic white sauce ( bechamel ), proscuitto and roasted asparagus rolled up or neatly folded into a crêpe and accompanied by a Hollandaise sauce, or even Pizza stuffed crêpes...there are so many possibilities! 
One last way to serve them is as a dessert. Rolled up loosely and filled with whipped cream and topped with a fruit sauce such as strawberries, blueberries..etc. Even more tempting is to fill the crêpe with fresh strawberries and cream, roll it up and top with a caramel or chocolate sauce ;) Are you salivating yet? 


French Crêpes
     Yields 30-40 crêpes

2 cups all purpose flour
1 tsp salt ( if making savory crêpes add more salt to taste )
1/3 cup sugar ( for slightly sweetened crêpes, omit if making a savory or neutral recipe)
3 Eggs
3-5 cups of milk ( 2% or higher for better taste...however they are good with low fat milk as well )
1/2 cup melted butter
Non-stick pan
Thin plastic ( heat resistant ) spatula


Directions:

1 Mix all dry ingredients together in a large bowl with a whisk.
2 Whisk the eggs and three cups only of the milk. Slowly whisk in the melted butter.
3 Start adding the dry ingredients to the wet, all the whisking to fully incorporate. Once all the dry ingredients have been added you should have a thick batter.
5 The consistency you want to achieve is thin and syrupy. Add the rest of the milk 1/2 a cup at a time until this consistency is achieved. You may or may not need all of the milk listed in the recipe...and it is possible you may need a smidgen more. If there are any lumps, you can always pass the batter through a blender or use an immersion blender.
6 Time for cooking: Using a non-stick pan on medium heat ( you may still need cooking spray, although not for every crêpe only every other 3-4 crêpes)
I use a 2 oz ladle and it gives me the perfect crêpe size. Ladle the batter into the center of the pan...you want a thin crêpe, so tilt the pan counter-clockwise or clockwise ( depending on whichever you are best comfortable doing ), and slowly spread the batter so that it spreads the batter into a larger circle than initially ladled. This may take some practice...but we all know the first crêpes or pancakes don't turn out as pretty anyway ;)

You want to start to loosen the edges of the crêpes when the edges are all cooked and the batter is 3/4 cooked in the middle. So, start by sliding your spatula all the way around the edges of the crêpe to loosen the edges and then slide under the middle to completely loosen it. Flip over...but be careful not to rip the crêpe. 
    Here is a picture of what that looks like.

This is a picture of the crêpe flipped...not too dark not too light. This picture also lets you see how I took the original ladle of batter and spread it around by tilting the pan and rotating it counter-clockwise. This makes the crêpe's circumference bigger and makes for a thinner crêpe ;)
Once the crêpe has been flipped cook for 30 seconds to 45 seconds longer and it should slide right out of the pan.

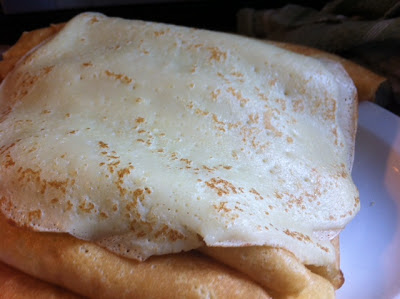
Here is a picture of the underside all beautifully speckled.

You can roll them up and stack them or you can fold them in half and then fold them in half again which will give you a pretty little triangle ;) Enjoy!!

Monday, June 3, 2013

The Ultimate Asian Noodle Salad

This is such a versatile recipe and very appetizing to look at...I make it quite often at work and it's always a great seller. It can be eaten cold or hot. I'd also like to mention that it is quite inexpensive to make ;) You can make this with any type of meat, fish, seafood or even vegetarian. For this particular version I used shrimp which just adds more the allure! Alright,let's get started! This is a two-fer recipe, which means you get two awesome recipes in one ;) The first part of my recipe is the Asian sauce which is super versatile. It is great as a vinaigrette, stir-fry sauce, fried rice seasoning, marinade...get what I mean ;) I like to keep a batch on hand so that I can make quick meals.
 

Asian Sauce
Yields 1 1/4-1 1/2 cups sauce

 1/3 cup sweet chili sauce ( in Asian section of grocery store)
4 tbsps soy sauce
4 tbsps rice vinegar
2 tbsps sugar 1 tbsp sesame seed oil
2 tbsps vegetable oil 1 clove of garlic, minced or 1 tsp of garlic paste 1 tbsp chopped cilantro ( optional)
1 tbsp minced ginger ( fresh or pickled)
Salt and pepper to taste

Directions: Whisk by hand or emulsify using a hand held immersion blender, all of the ingredients above. Set aside.


  Noodle Salad
 Yields 4 moderate servings
 *Note that this salad can be made with whatever vegetables you have on hand, those vegetables listed in my recipe are my suggestions only.

 1 Package vermicelli rice noodles ( soaked in hot water until they soften) 2 cups bean sprouts 1 red bell pepper, sliced julienne style
1 carrot sliced into thin julienne strips
4-5 green onion stalks chopped 1-2 pounds of shrimp, preferably without the tail
2 tbsp sesame seed oil
2 tbsp vegetable oil Asian Sauce recipe

 Directions:
Soak the noodles in enough hot water to cover the noodles and let sit until the noodles are softened. Depending on the brand of noodles you use this could take 5-25 minutes. The thinner the noodle the quicker it softens.
While the noodles are soaking, heat up 1 tbsp of sesame seed oil and 1 tbsp of vegetable oil and lightly saute on medium-high all the vegetables for 2 minutes. Remove the vegetables and set aside. Saute the shrimp on medium-high with 1 tbsp of sesame seed oil and 1 tbsp of vegetable oil until they are pink. Remove and add to the vegetables.
Drain the noodles and using a pair of kitchen scissors, cut the noodles up a bit so that they are easier to work with. Saute the noodles on medium-high for 2 minutes with 1/2 cup of the Asian sauce.
Add in all the vegetables and shrimp and incorporate. Take off the heat and add the rest of the sauce, incorporate well and serve hot or let it cool and refrigerate to serve cold.

Tuesday, December 13, 2011

Meatloaf en Croûte (Wrapped in Puff Pastry)


I hadn't made meatloaf in ages...for some reason I was over it in a big way. Yet a week ago I decided we needed something different for dinner and I went ahead and bought some lean ground beef on sale that week. I love it when I get in the kitchen and I am hungry and motivated to make something that I hope really turns out great! This was one of those days and it was a huge success! As I was defrosting the the meat, I started to go through the ingredients I thought would make this meatloaf "THE" meatloaf I would forever make thereafter...and I had just bought some puff pastry the week before and thought it would be interesting to make a Beef Wellington kind of meatloaf...and then wondered if this had been done before...and google confirmed that it had indeed been done before...so it isn't original but this recipe is a good one. I wrote down everything I did and now I share it with you ;) P.S. I did the same things with Salmon today and it was very yummy as well. I just changed the ingredients some...here is picture of the Salmon en Croûte.


NOTE: I used 4 lbs of meat for this recipe and it made us 2 family sized meatloaves and 1 medium meatloaf...so if you want just one good sized meatloaf cut this recipe in half and use 1 1/2- 2 lbs of ground beef.


You will need:

4 pounds lean ground beef
1 225gr. box of mushrooms, diced
2 small onions, diced
5 strips of bacon, chopped
1 red bell pepper, diced
1 box of chicken flavored Stove Top Stuffing
1/2 cup milk
2 eggs
1 egg, beaten to eggs wash the pastry
1/2 cup ketchup
3/4 cup diced canned tomatoes
2 sheets puff pastry
Salt and pepper to taste


Directions:

1 Preheat oven to 350F and make sure your puff pastry is defrosted. If you take it out of it's box but leave it wrapped while you prepare your meatloaf it should still be cold by the time you are ready to use it.

2 In a frying pan on med-high heat fry the bacon until it starts to get a little crispy around the edges but the center is still tender.

3 In the same frying pan still on med-high heat, using all that flavorful and not-so-good-for you bacon and bacon grease...add your onions, bell pepper and mushrooms and sauté your vegetables until the mushrooms are tender and shiny. I like to season with salt and pepper not only for added flavor but the salt helps to soften the veggies quicker. Don't cook the mixture dry- you want to have some pan juices for added moisture. Turn off heat when done and let cool.

4 In a small mixing bowl ( or the pouch it comes in...is what I did, lol), add the 1/2 cup of milk to the stuffing mix. Mix it well and let it sit for 2-3 minutes. This will allow the milk to be absorbed fully.

5 In a large mixing bowl combine the ground beef, eggs, milk soaked stuffing, ketchup, sautéed bacon and veggies and their pan juices, and 3/4 cup diced canned tomatoes with your HANDS!!! Yes...with your hands people!! If you are squeamish about touching raw meat, don on some gloves, but by all means, use your hands. Why you ask? Because you don`t want to over mix the meat. Over mixing will produce a paté like meatloaf when what you want is a tender fall apart in your mouth meatloaf- yet it holds together for cooking, cutting, and plating. And never use a mixer to do this!! Hands are the best tool you have in the kitchen when it comes to mixing ;) The proper technique is to fold the ingredients in with your hands making sure your ingredients are properly distributed in the process. Season well with salt and pepper.
NOTE: How do you know that the raw meat mixture is seasoned enough? Take a tablespoon amount and put in a thin layer on a plate. Microwave it for 2 mins approx. and taste it. Season accordingly.

6 On a lightly floured sheet of parchment paper, lightly roll out the puff pastry sheets. Gently stretch it out so it will cover your loaf well. Form a loaf in the center of the dough and fold the two sides over the middle. There is no need to completely cover and seal the edges, leaving and opening will simply look like every other slice you cut...meatloaf in the middle with puff pastry crust.

7 On a parchment paper lined baking sheet, take your meatloaf by the sides of the floured parchment paper, place your hand over the pastry covered meatloaf and turn it over and onto the parchment lined baking sheet. You now have a nice unblemished pastry covered meatloaf ;)

8 Using a well beaten egg and a pastry brush, wash the puff pastry with egg. This will give it a nice shiny golden finish. Cook for 50 minutes to an hour. I always keep an instant meat thermometer in the kitchen to see when the meat is ready. Cook until it is 150-155F inside the thickest part of the meatloaf- only piercing it half way through. Remember it will continue to cook for another 5 degrees after taking it out of the oven.
Slice and serve with gravy or a Roasted Red Pepper sauce and any choice of sides.

Friday, August 26, 2011

Zesty Seafood Salad Subs


I came home from work at Le Bordelais tired and hungry! I momentarily wished I had accepted lunch at the restaurant, but if I had I wouldn't have been inspired to make this seafood salad ;)


You will need:

3 Heaping tablespoons of mayonnaise (Helmans real mayo is suggested)
2 Stalks of green onions, sliced
1 tsp of Parsley paste (or 1 tbsp freshly chopped -the store I went to only had paste)
1 cup of cocktail shrimp(cooked, de-veined, etc.)
5-6 pieces of crab and pollock slices, chopped. The variety I used is a mix of the two, however I am sure crab flavored pollock would work fine.
Salt and pepper to taste
Bread or rolls of your choice

Zest of one lime (I like using a microplane to do this, as pictured)

Juice of one lime

Your choice of cheese, I used what I had on hand which was a firm goat cheese used for raclette grilling

Directions
Start by mixing the mayonnaise, parsley, lime zest, lime juice, salt and pepper together.


Add the shrimp, pollock, crab and green onion slices to the sauce and mix until everything is well incorporated. Serve in a sandwich on the bread of your choice or with salad greens as part of a salad.

Bon appétit!!

Monday, August 8, 2011

Flourless Peanut Butter and Chocolate Chip Cookies


I made these cookies last night because I needed something quick and sweet. This really did the job! They have just the right texture crisp on the outside and soft on the inside. And who can resist a PB and chocolate desert? Not me...;)

You will need:

1 cup peanut butter
1 cup sugar ( I suggest 3/4 a cup if using chocolate chips as well )
1 egg
1 tsp. vanilla
1 cup chocolate chips ( optional )

Makes approx. 12-16 cookies. I doubled the recipe and made 32 cookies.

Directions

1 Preheat oven to 350 and mix peanut butter, sugar, egg(s)and vanilla together until the mixture is consistent and smooth.
2 Fold in chocolate chips.
3 Form dough into balls and place on a parchment lined baking sheet 1 inch apart. My kids love helping with this part and they also like making a checkered design on top of the cookie using the tines of a fork.
4 Bake for 8 minutes or until golden brown around the edges and the center of the cookie looks mostly cooked. Let the cookies rest on the hot tray for at least 2 mins before removing to a cookie rack or plate.

Enjoy!!

Tuesday, August 24, 2010

Flat Bread

Pita, Naan, Flat Bread, Tortilla, etc...


I can truly take credit for this creation, because I came upon it by fortunate chance while trying to make a tortilla recipe from memory. It is everything I have ever looked for in a flat bread recipe: it is super soft and flexible and doesn't break or crack when rolled up burrito style. When made thicker is is divine served with whipped honey butter, hummus, or even with a bowl of chili.
This recipe can be used to make any of the above mentioned types of flat bread providing that you roll out your dough to the desired thickness for each type of bread. Naan, Pita and Flat breads are all thicker types of bread. The only thing that separates them is their respective traditional shapes. Naan is teardrop in shape, Flat bread is square or rectangular, and Pita is oval shaped. For Tortillas simply roll out your dough into a thin circle.
* This recipe works best with 2 people, one to roll out the dough and the other to cook them. My husband is my cooker...see if you can hook your hubby into becoming your cooker! It can be done alone...but don't let your shaped dough stack on top of each other for too long before cooking because they can stick together and they lose their coldness which starts to break down the cold shortening.

Makes 11 medium sized breads; 15 mins prep not including fridge time; takes about 10 mins to cook all 11 breads.
You will need:

2 3/4 cups all purpose flour or bread flour
2 tsps. baking powder
1/2 tsp. baking soda
3/4 tsp. salt
2 tbsps. sugar or splenda
1/3 cup COLD shortening
2-3 cups COLD water
1 cup of additional flour for rolling out
1 cup of reserved flour for kneading
1 tbsp. vegetable oil for seasoning the pan
1 large cast iron skillet * ( this recipe cannot be made on a non-stick pan, it requires a thick pan that evenly distributes heat and seares the bread on the outside while steaming it from within )


Directions:

1 In a large mixing bowl add all dry ingredients except the 1 cup of flour reserved for rolling out your dough, and mix well using a whisk.

2 Add the cold shortening and using a pastry knife, cut the shortening into the flour mix until it resembles course crumbs.

3 Add the cold water half a cup at a time while mixing it with a fork. You want to form a very sticky dough. This may take more or less of the water called for.

4 Add a little of the reserved flour for kneading, and knead the dough while alternatively adding some flour until your dough is no longer sticky to the touch and smooth and soft in texture. It should be very soft to work with.

5 Cover and place your dough in the fridge to rest for 10-15 minutes.

6 On a floured work surface break off 2 inch piece of dough and form in to a ball. With a rolling pin roll out your dough to your desired thickness and shape. Remember that this recipe has rising ingredients and it will puff up and thicken during cooking. A dough that is 1/4 of an inch thick will rise to be about 1/2-3/4 of an inch thick. The second time making this recipe will be easier to determine desired thickness. Once you have your shape, slap the dough between your hands a few times, like tossing it back and forth, to improve elasticity and to remove excess flour.

7 Prepare your cast iron skillet with your tbsp. of oil. Rub it in using a paper towel and preheat your pan to med-high heat. You are only using the oil for the first time, these breads are cooked in a dry pan, they are not fried.

8 Once your pan is preheated, lay your dough in the center of the pan and cook on each side for 25-30 seconds. It cooks very fast and you should see it puffing up. Like with pancakes your first two will look less pretty than the rest- but they will still taste good! Since every stove is different, you may need to adjust your burner to the necessary temperature. You want to sear the bread on the outside and steam it on the inside, so you need a good level of heat to do so, but without burning your bread. If you see burnt spots- black not brown, you should lower your heat a notch.

These can be served alone or with chili, in a pita salad or with burritos as suggested in pictures above.